How Can We Help?
How to Run Reports and Set up Recurring Reports
Reports let you organize, filter, and export the data from your fuel transactions. An account can have an unlimited number of reports and running reports doesn’t affect your transaction data in any way, so you’re free to customize your reports however you need!
To Create a Report
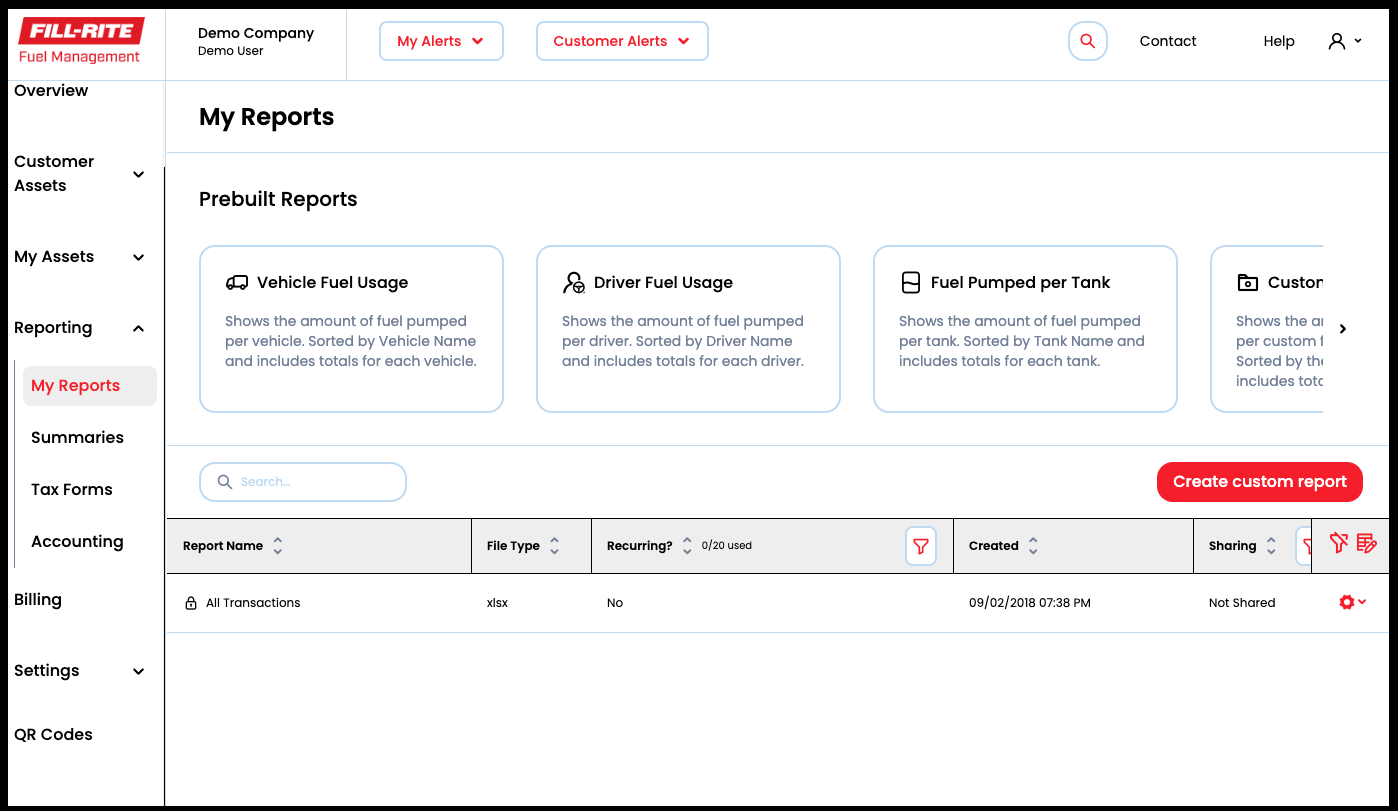
- Go to Reporting on the left menu and click My Reports
- Click Create custom report to create a custom report or select a Prebuilt Report to save time.
To Create a Custom Report⯅ Back to top
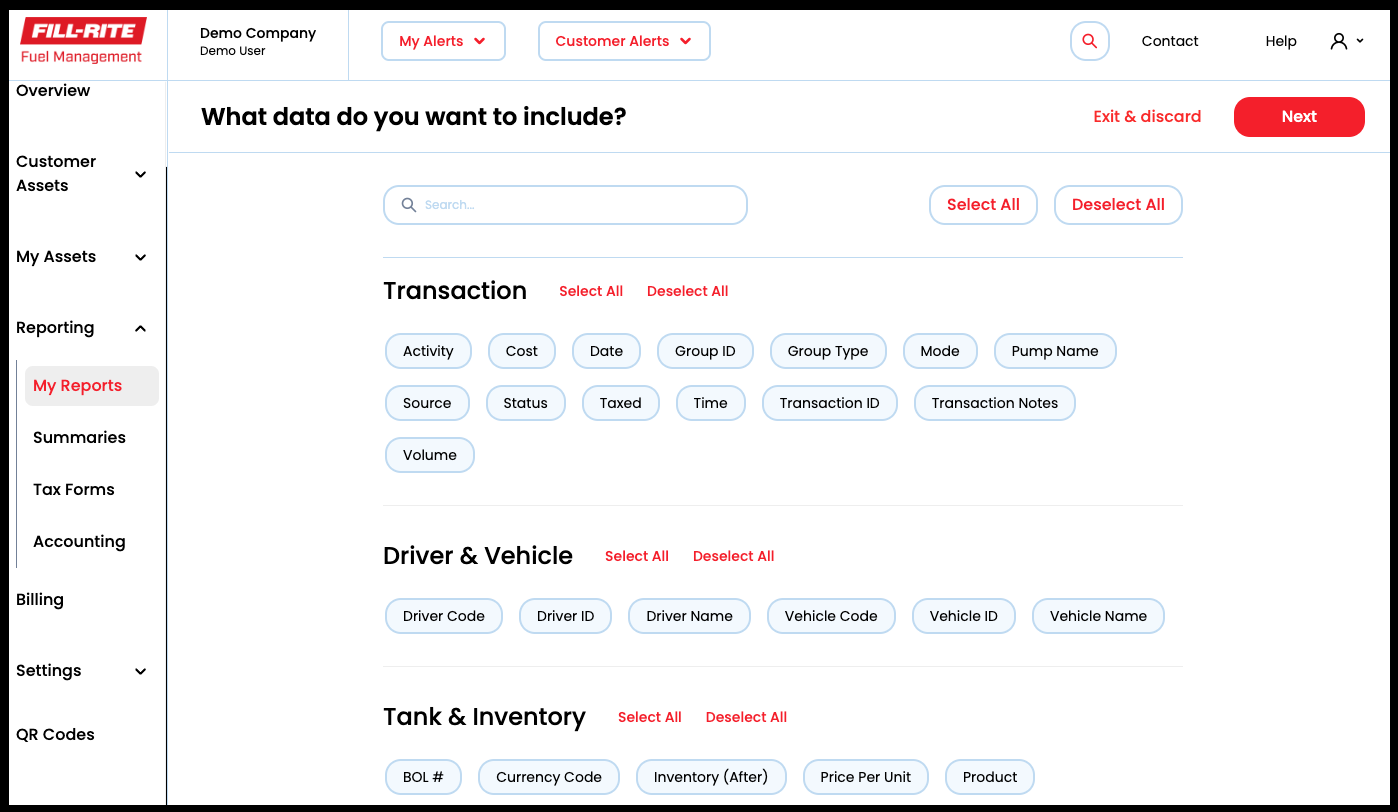
- Select the data you would like to include in your report. Each data item you select will become a column in your report.
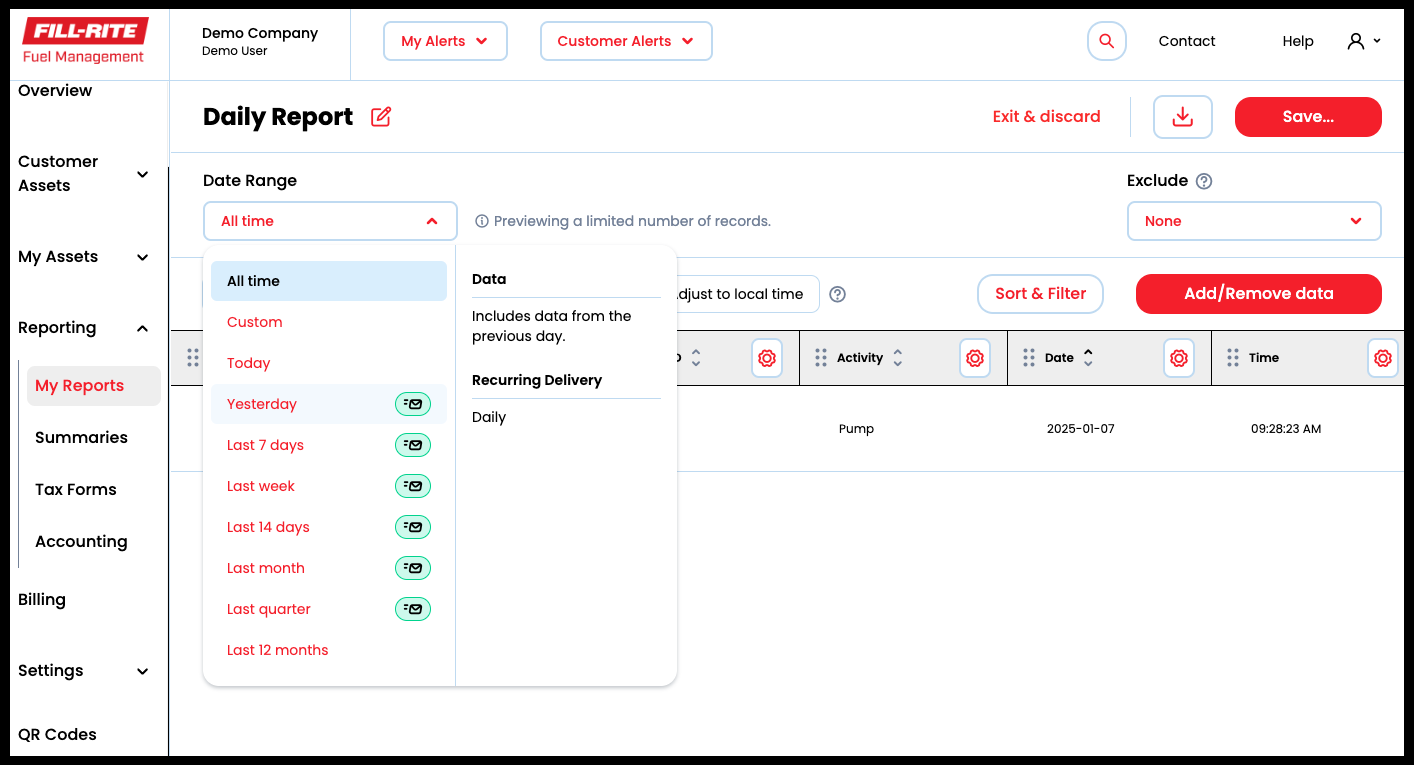
- Choose your Date Range (Note: for information about recurring reporting, see Recurring Reports).
- Any transactions created within your selected Date Range will be included in your report.
- Quick date range options include: All Time Today Yesterday Last 7 Days Last Week Last 14 Days Last Month Last Quarter Last 12 months
- For more control over Date Range, use the Custom option to select any two dates you prefer.
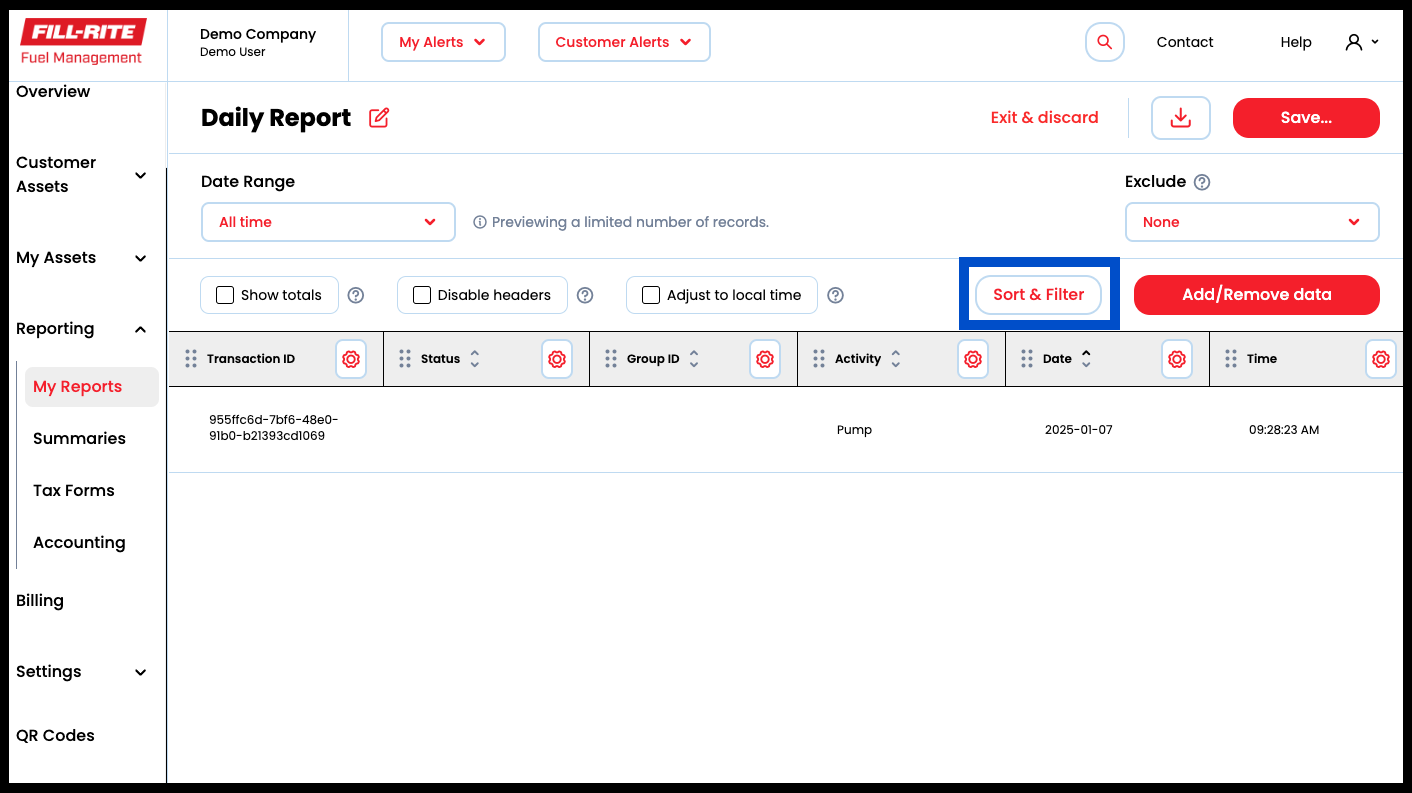
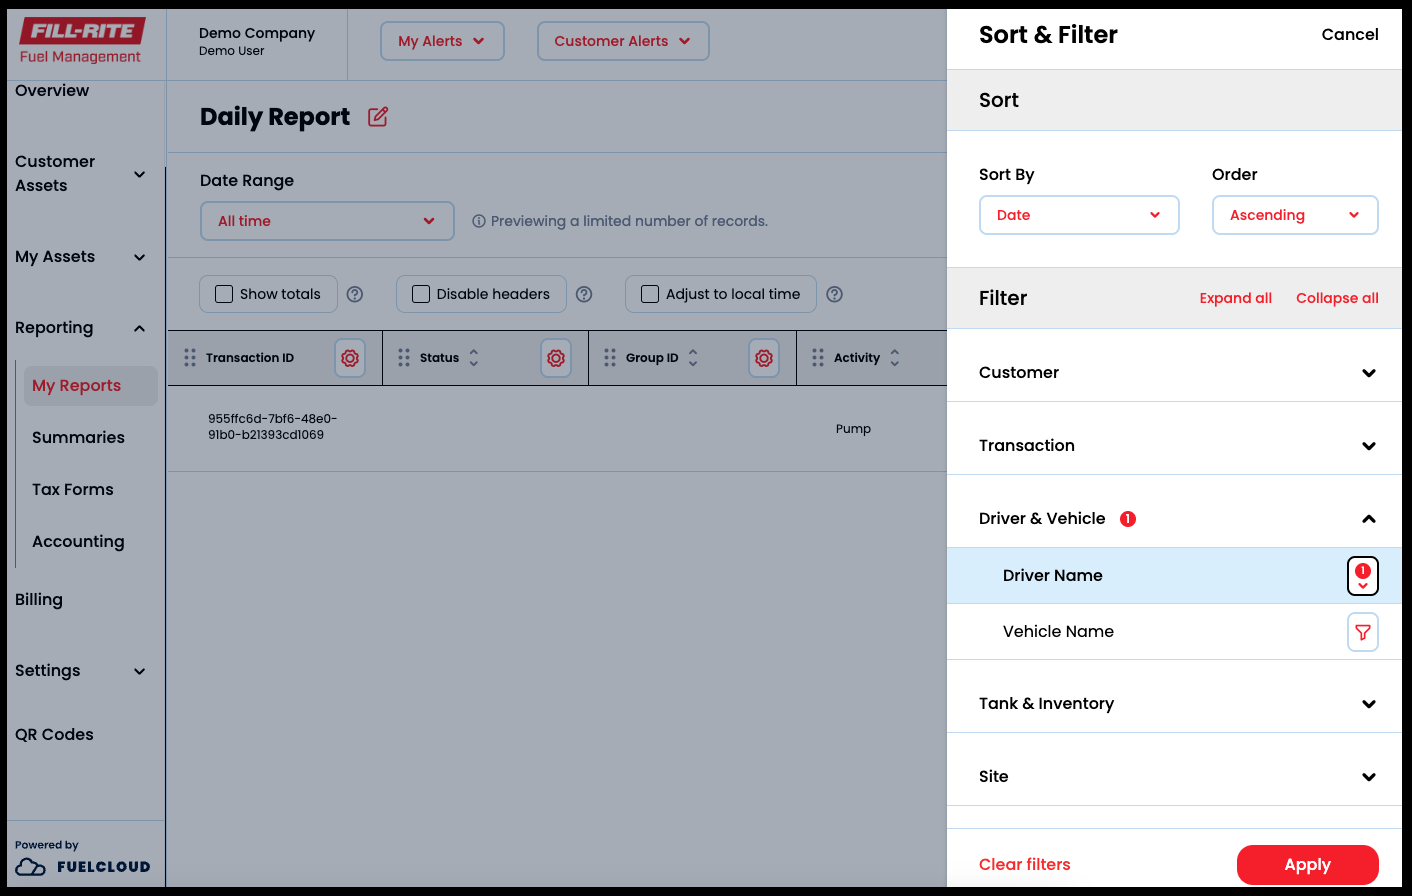
- Choose which data to Sort & Filter your report by. The default sorting is by transaction date.
- Filters let you customize your report so it contains only the transactions you need to see.
- If you only want transactions from a specific Driver, use Filters. Filters can be used for as many fields as you need, they let you narrow how much data is included in your report.
- Customize the report how you would like.
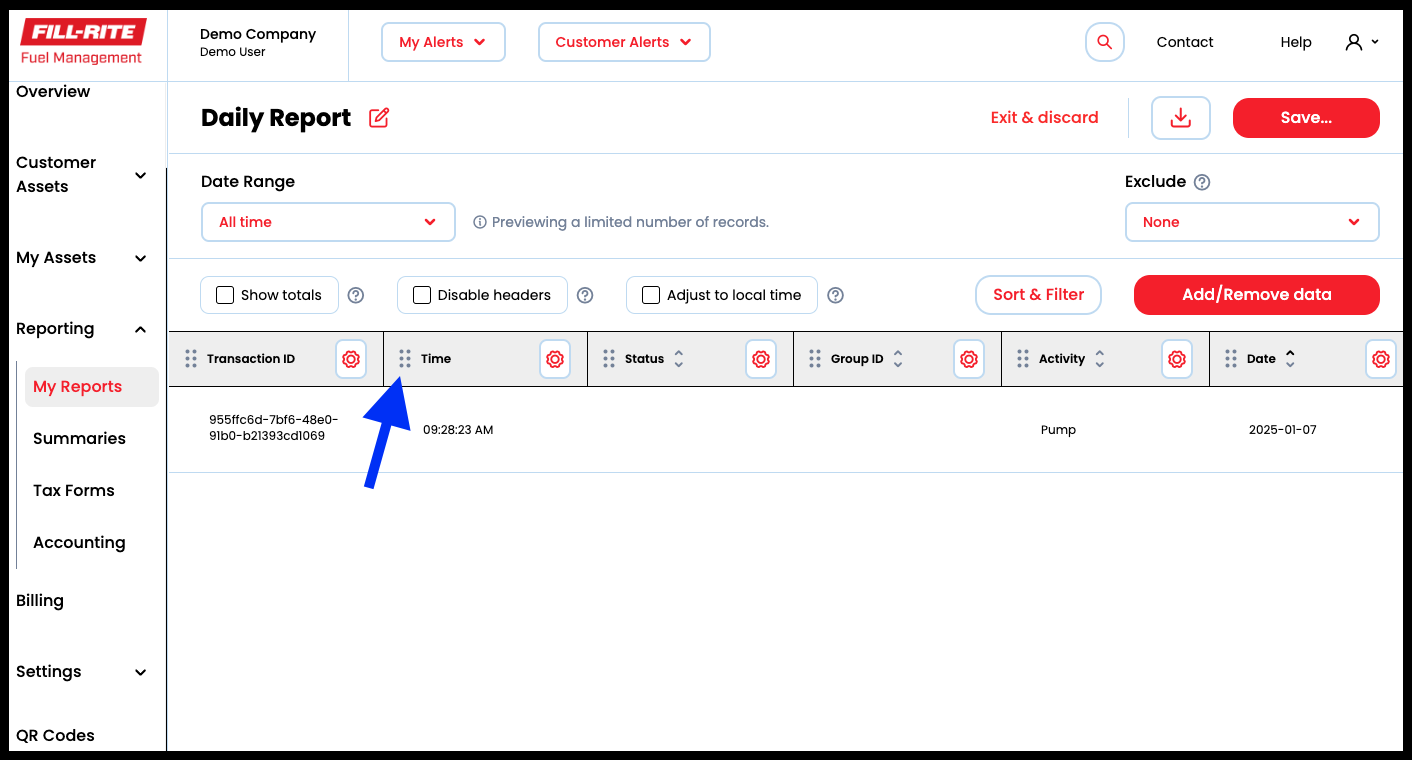
- Rearrange the columns by selecting the dots to the left of each column and dragging to the desired location.
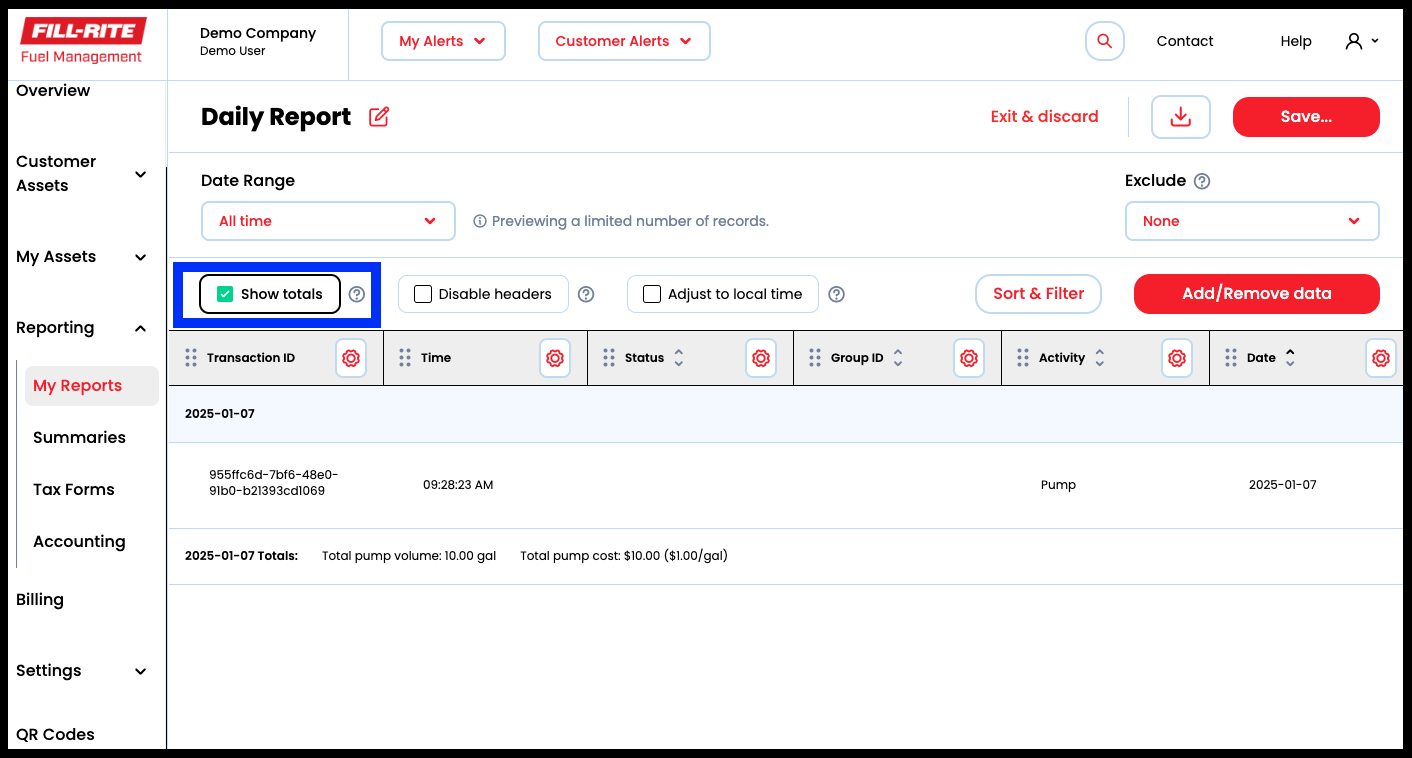
- You can select Show totals to include Volume and Cost subtotals for each set of similar values in your Sort column.
- For example, if you check the Show totals checkbox and sort your report by Driver Name, your report will have a subtotal of the volume and cost of transactions created by each driver.
- You can use the Show totals feature with almost any attribute of a transaction, including but not limited to: Driver Name, Vehicle Name, Product Type, and even Custom Data Fields!
- Rearrange the columns by selecting the dots to the left of each column and dragging to the desired location.
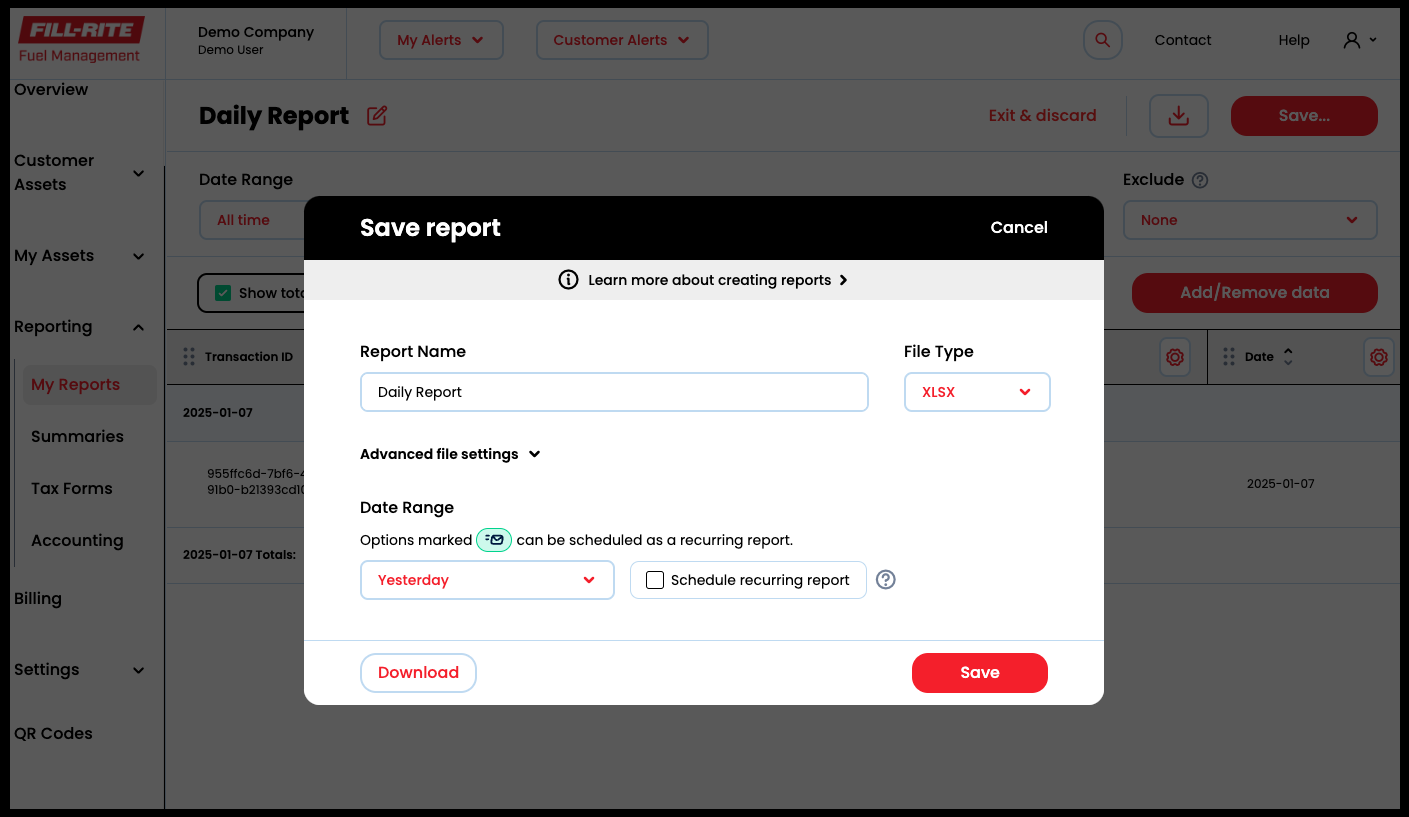
- When you are done, click Save
- Here you can change your export format. The default is .XLSX format. You can also export your report in .CSV, .XLS, .XML, and .TXT formats.
- For more information on recurring reporting, see Recurring Reports
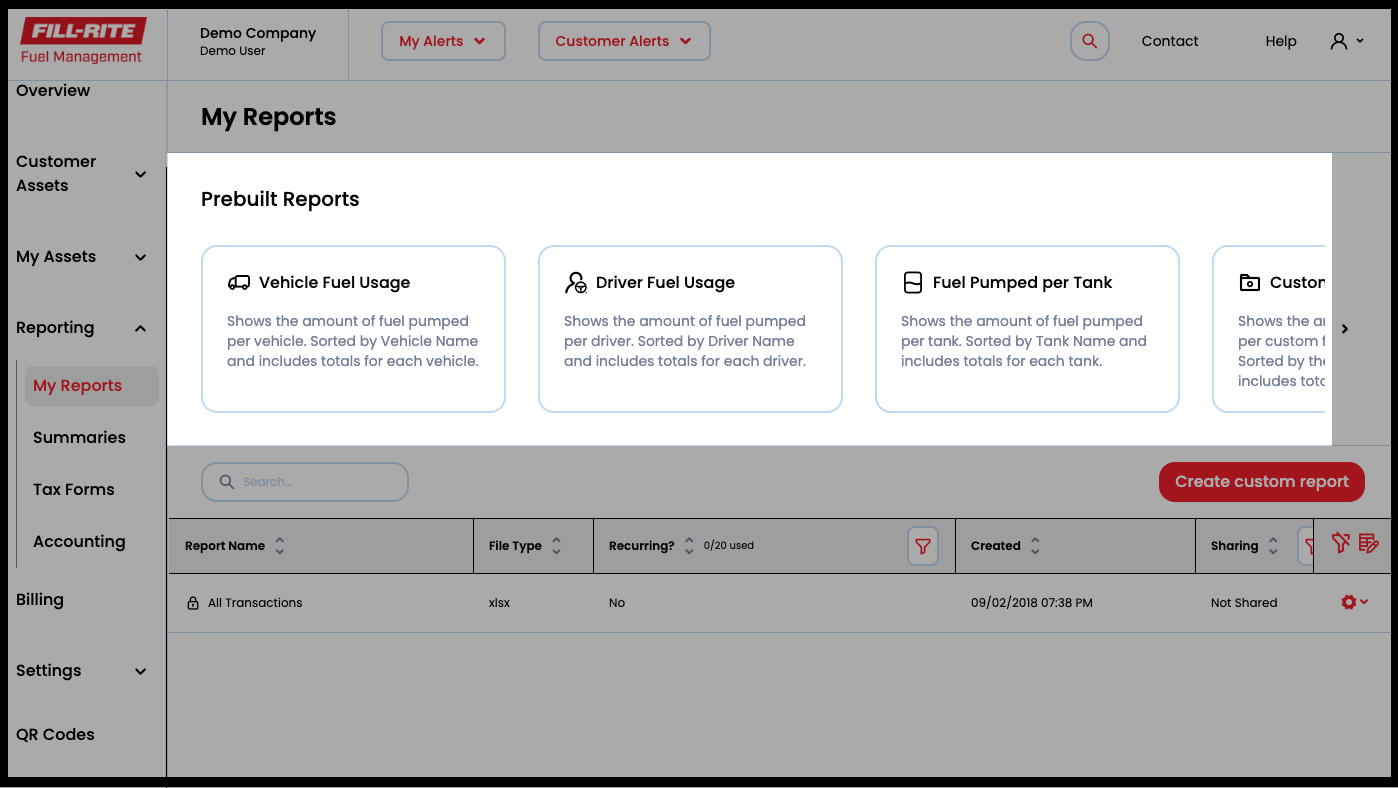
Create a Prebuilt Report⯅ Back to top
- Choose one of the four available prebuilt reports: Vehicle Fuel Usage, Driver Fuel Usage, Fuel Pumped per Tank, or Custom Field Fuel Usage
- Fill in the Report Name and select the Date Range (Note: for information about recurring reporting, see Recurring Reports).
- Any transactions created within your selected Date Range will be included in your report.
- Quick date range options include: All Time Today Yesterday Last 7 Days Last Week Last 14 Days Last Month Last Quarter Last 12 months
- For more control over Date Range, use the Custom option to select any two dates you prefer.
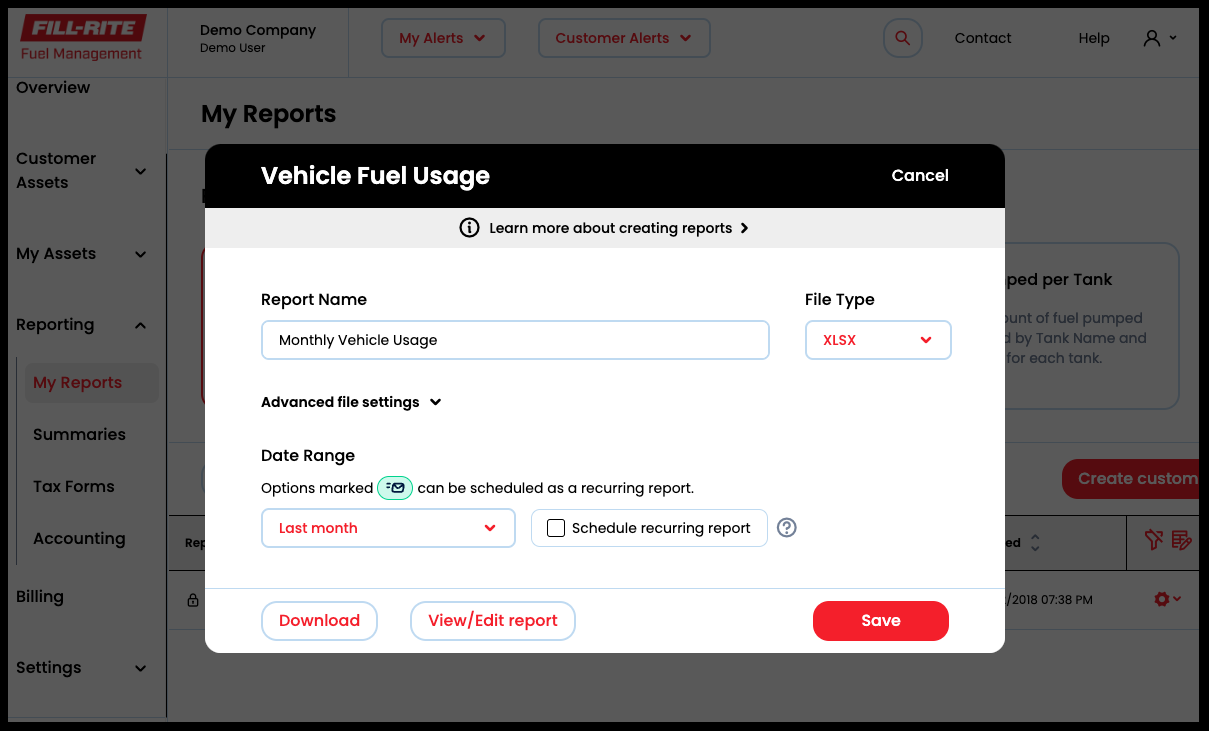
- Select Save and you are done!
- If you would like to make more edits and customize your report, you can select View/edit report to go to the Edit page, where you can select additional filters and make advanced changes.
Advanced Report Options⯅ Back to top
Edit Column Title
When you create a report, each column will be named using a default name from FuelCloud. If you want a column to have a different label you can select the gear icon on the column. For example, if you want the Driver Name column to be labeled Employee instead, you can update the Column Title.
Data Format
Certain types of data have a variety of built-in ways they can be displayed. For example, if you want time to show as a 24-hour clock, or a 12-hour clock with AM/PM, you can do that by picking the Format. Different types of data will allow different custom data Formats:
- Date: Choose how dates appear when exported. Day/Month/Year, YearMonth-Day, etc.
- Time: Choose between 24-hour (16:32:55) and 12-hour (4:32:55 PM) times.
- Volume, Price Per Unit, Cost, Inventory (After): Choose how many numbers appear to the right of a decimal point, and whether or not the number includes commas. Using the number 11,222.3456 as an example, different options include:
- 11,222.3456
- 11,222.346
- 11,222.35
Max Characters
If you want to limit the length of a certain field, use Max Characters. If the field’s value is longer than the Max Characters setting, the value will be shortened by cutting off the end. The original transaction will not be affected, only the data in the report will be shortened.
Exclude Zero-Volume, Bypass Transactions, or IDs from Sorting
- Zero-Volume: Some transactions may have 0 volume due to electrical noise or testing. These can be excluded from your report. The original transaction will not be affected.
- Bypass Transactions: Transactions that happened in Bypass mode can be excluded from your report if desired. The original transaction will not be affected.
- IDs: When Show totals is selected, totals are calculated by IDs instead of the name. If you select exclude IDs from Sorting, same-named items will get sorted and totaled together. For example, if you have two driver accounts named John Doe, if you exclude IDs from Sorting, the transactions from both John Doe drivers will get totaled together instead of having a separate total for each John Doe driver.
Advanced File Settings
- Static File Name: By default when downloading reports, the export date is included in the file name. Selecting Static File Name will remove the date and ensure the same name each time you download.
- ANSI Encoding: Older systems may not support modern encoding standards such as Unicode. You can download your report with ANSI encoding to ensure compatibility with older systems.
Recurring Reports⯅ Back to top
The Schedule recurring report setting lets you receive data from a report by email or SFTP automatically on a regular schedule. You can receive your Recurring Reports on a Daily, Weekly, Biweekly, Monthly, or Quarterly basis.
The starting date and delivery time can be customized to allow you to choose when your week, month, or quarter should start. Times are based on the time zone set in your Account Settings.
Select the frequency using the Date Range dropdown then select the Schedule recurring report check box to open the First Report date selection and Delivery Time options.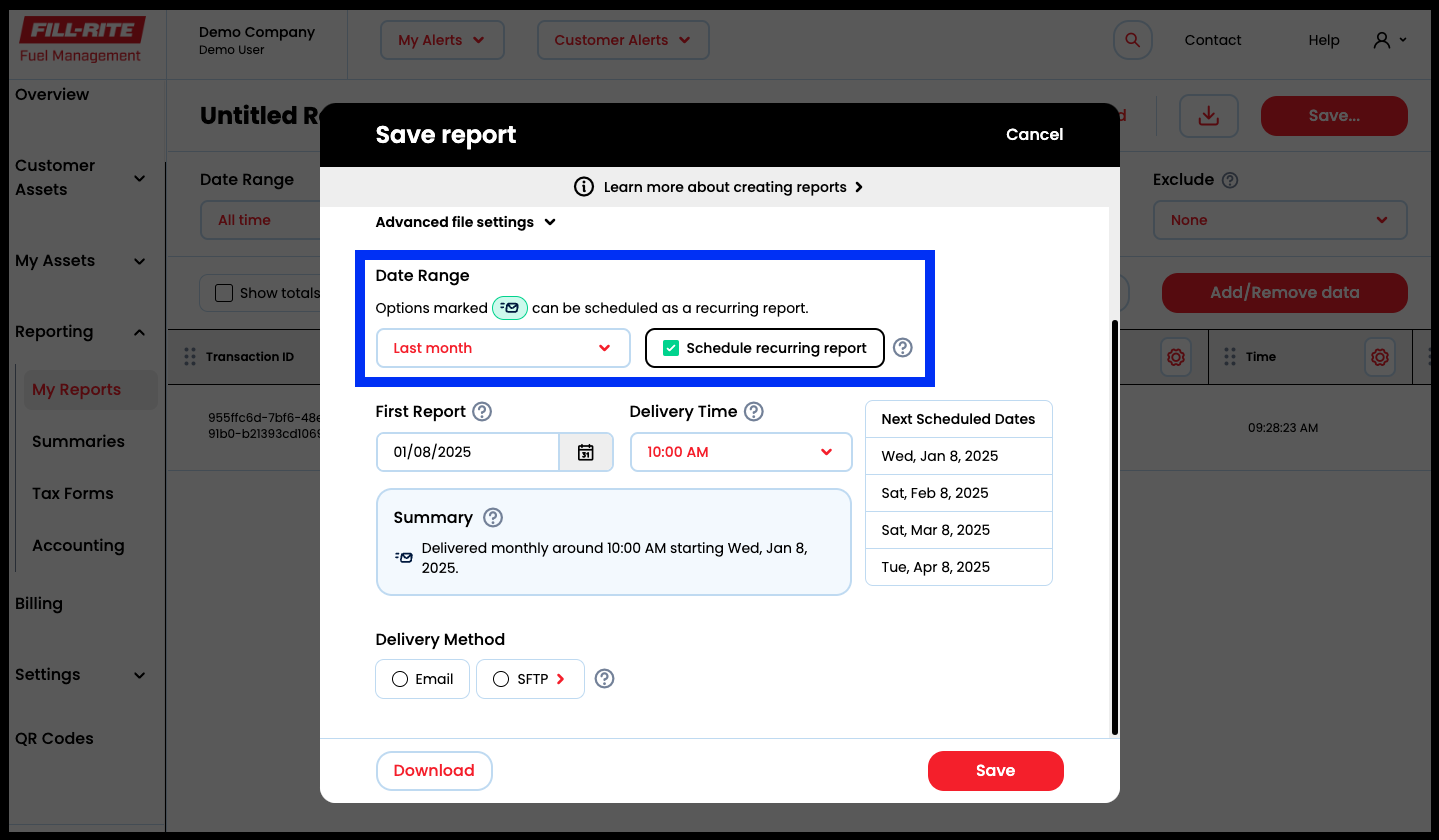
Choose when you want to start receiving your report with First Report and Delivery Time.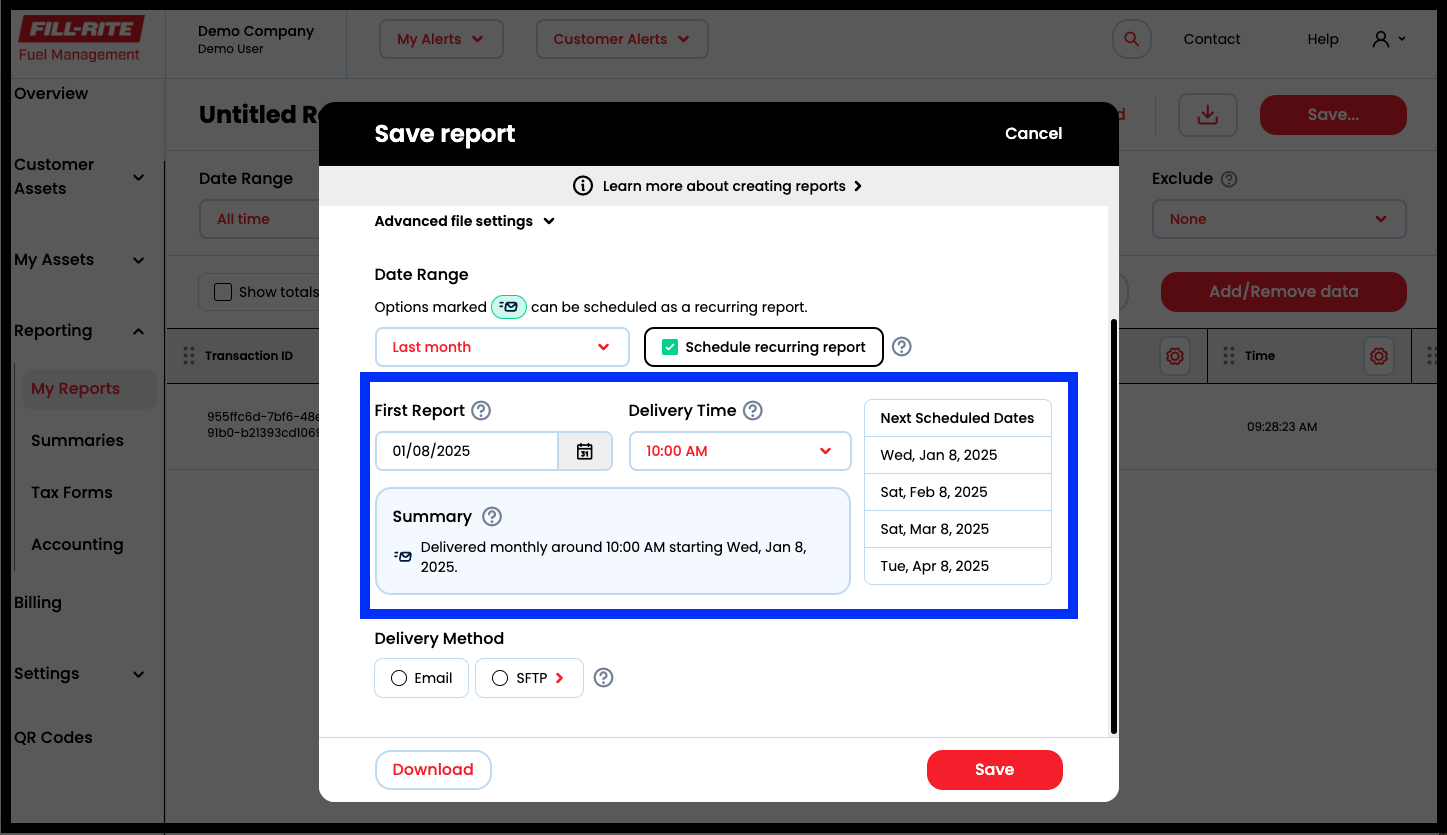
Choose your preferred Delivery Method. For Email, enter the Email Recipients in the entry box. Click Save when finished.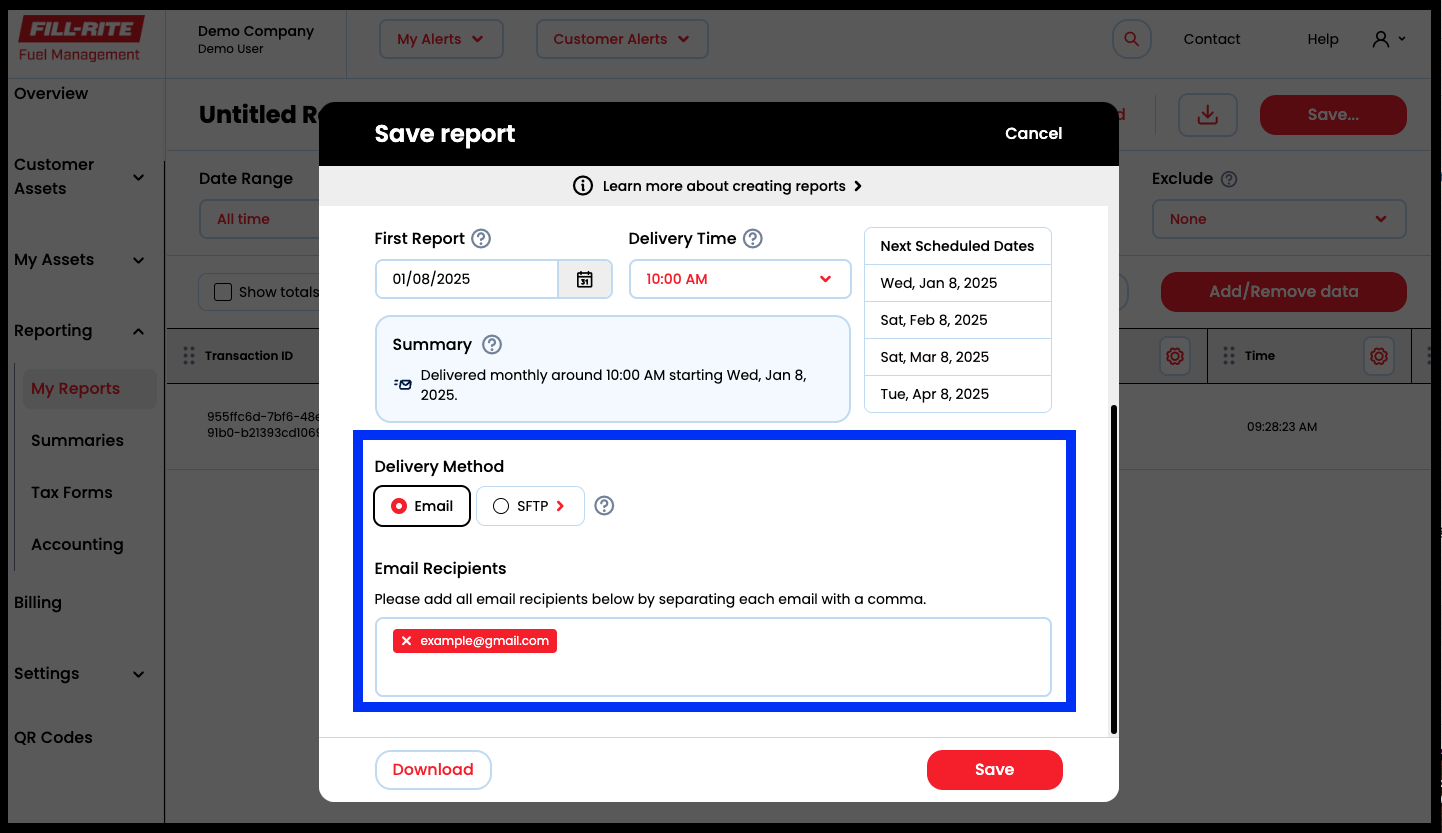
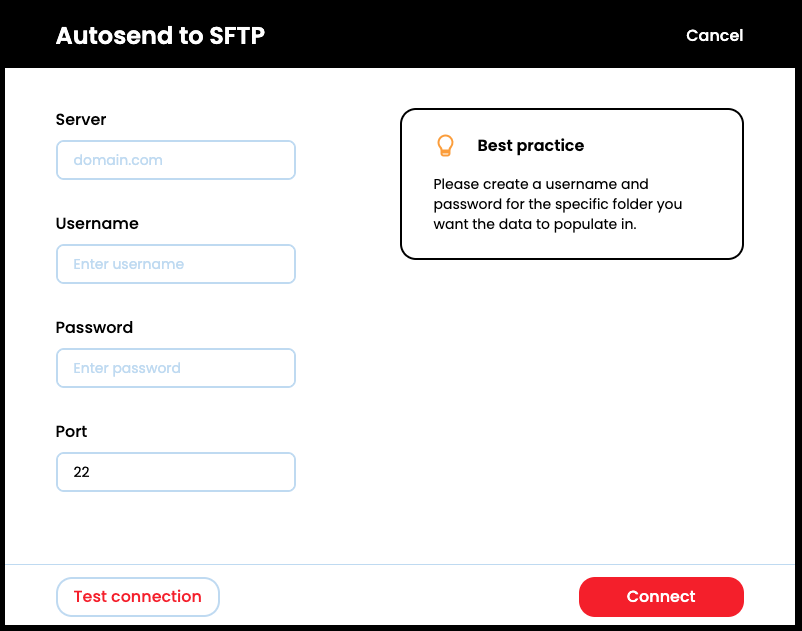
SFTP Credentials⯅ Back to top
Recurring Reports can be uploaded to an SFTP account on your server. The first step is to work with your IT team to be sure your SFTP account is set up and configured correctly. Once that’s done, you can add your SFTP credentials in the Report section in FuelCloud:
- Server: The IP address of the server where your SFTP account is located. This is generally in the format 123.123.123.123
- Username: The username for the SFTP account on your server.
- Password: The password for the SFTP account on your server.
- Port: The default port for SFTP is 22. If this isn’t working for you, check with your IT
team to see if they’ve changed this from the default.